Ultrasound · Shoulder
Subacromial–Subdeltoid Bursa Injection
shouldersubacromialbursasubdeltoidimpingement
Treats
- Shoulder impingement syndromes
- Rotator cuff–related pain with bursitis
- Primary or secondary subacromial–subdeltoid bursitis
Contraindications
- Active local skin infection or cellulitis at the entry site (absolute)
- Suspected septic bursa (absolute — aspirate first, do not inject steroid)
- Known allergy to local anesthetic, steroid, or antiseptic prep (absolute for that agent)
- Therapeutic anticoagulation — review case-by-case
- Uncontrolled diabetes (relative — steroid raises glucose for 3-5 days)
Pre-procedure checklist
- Confirm patient identity (two identifiers)
- Confirm procedure, side, and site — mark site with patient awake
- Review allergies (anesthetic, steroid, latex, chlorhexidine, iodine)
- Review anticoagulation status
- Confirm informed consent
- Pre-scan to confirm anatomy and rule out variants
- Time-out immediately before needle entry
Positioning
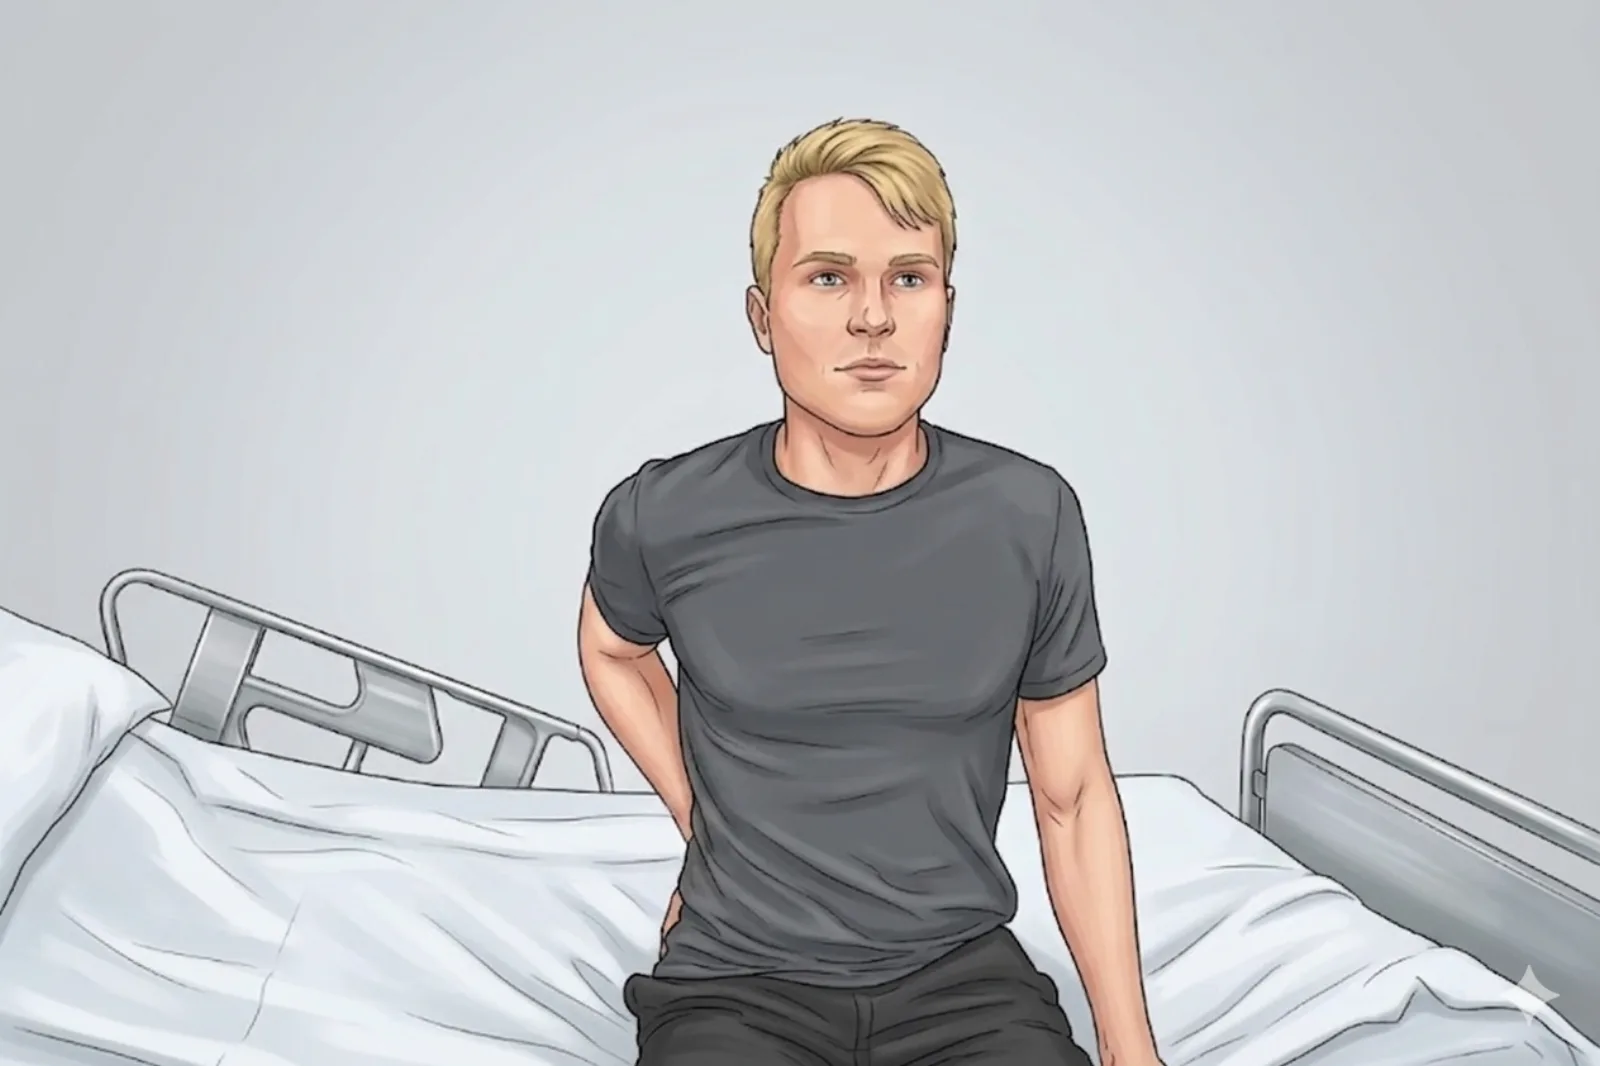
- Modified Crass position: patient seated with palm of ipsilateral hand flat on the iliac crest, elbow directed posteriorly.
- This internally rotates the humerus, bringing the supraspinatus footprint out from under the acromion.
Probe
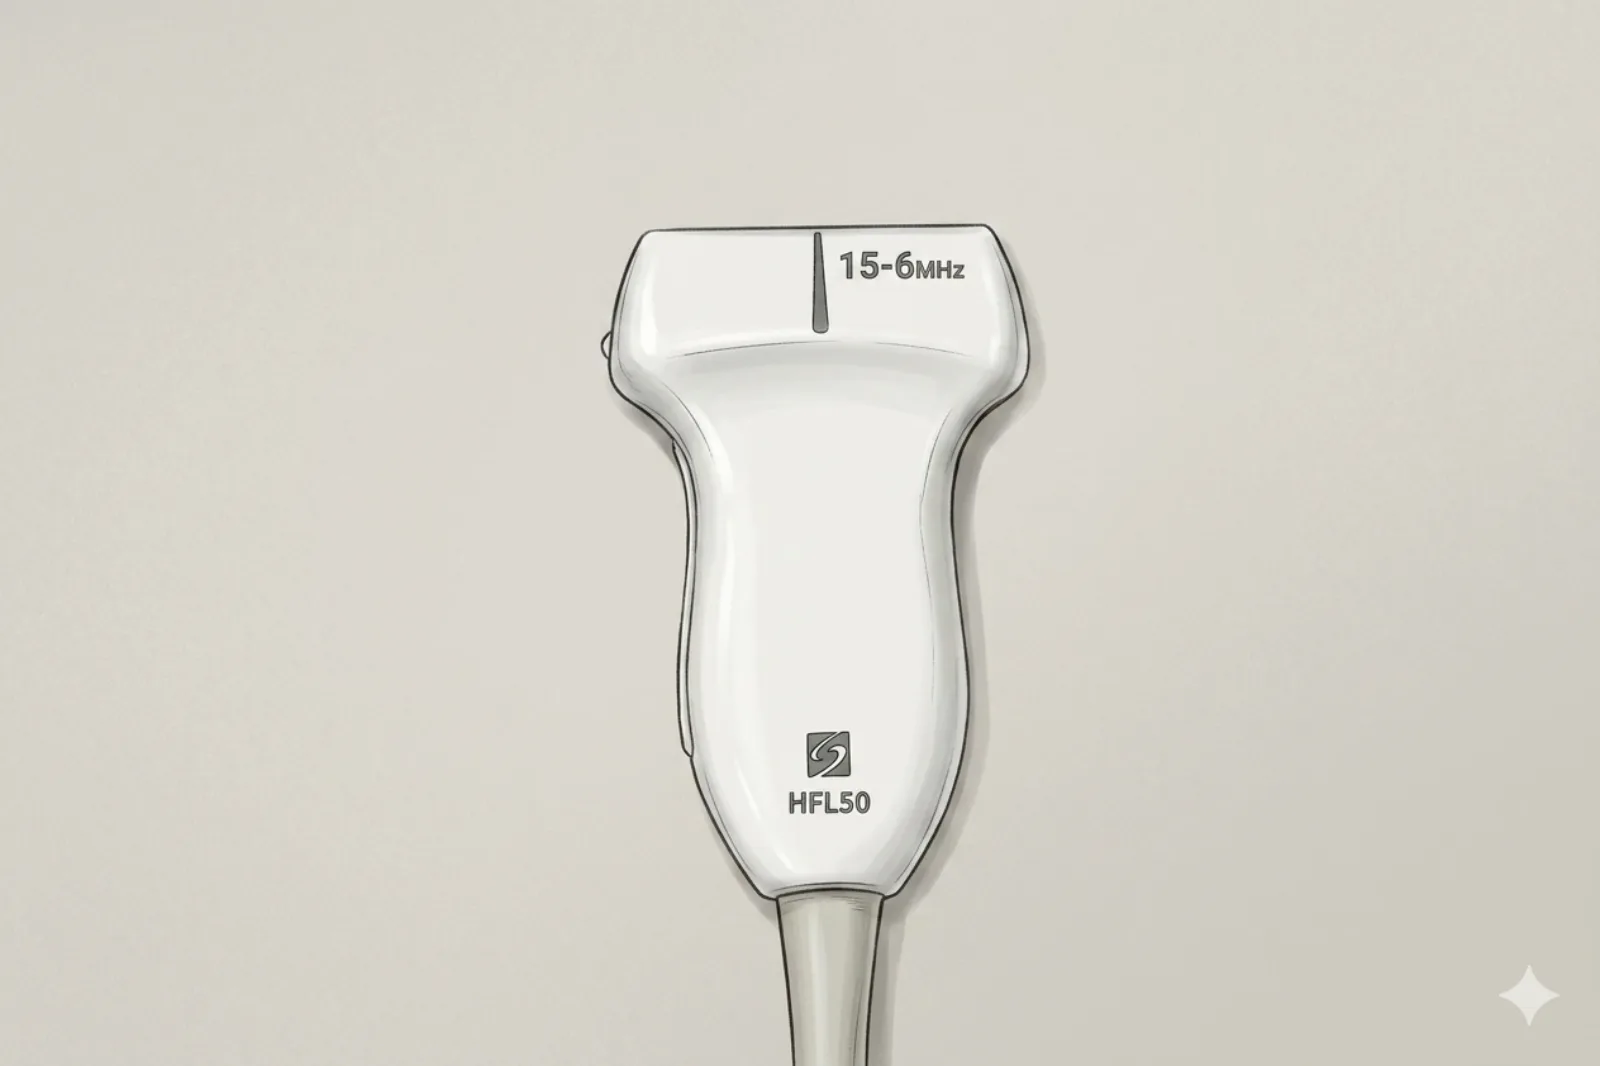
- High‑frequency linear probe (6-13 MHz) (best for superficial structures)
Landmarking — find the view
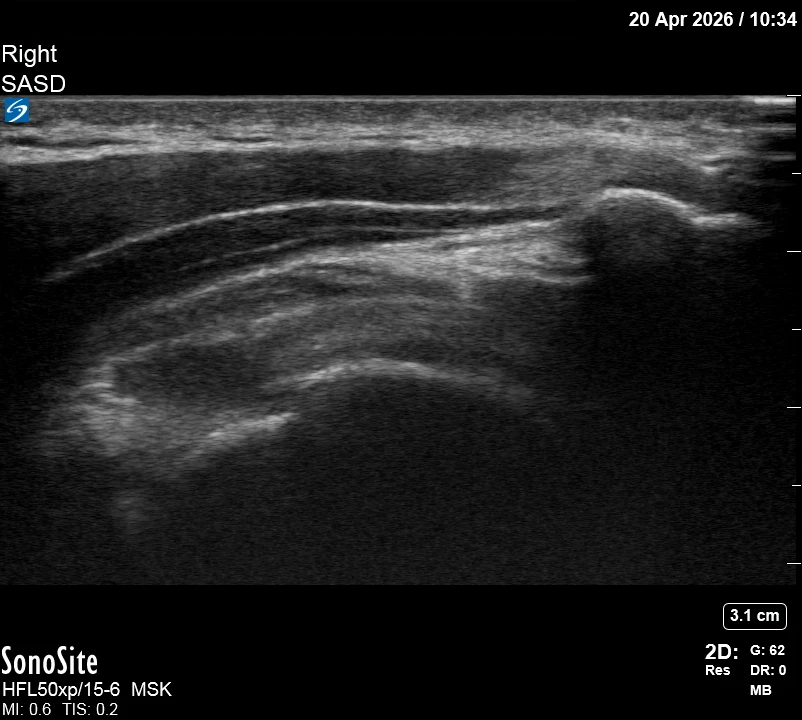
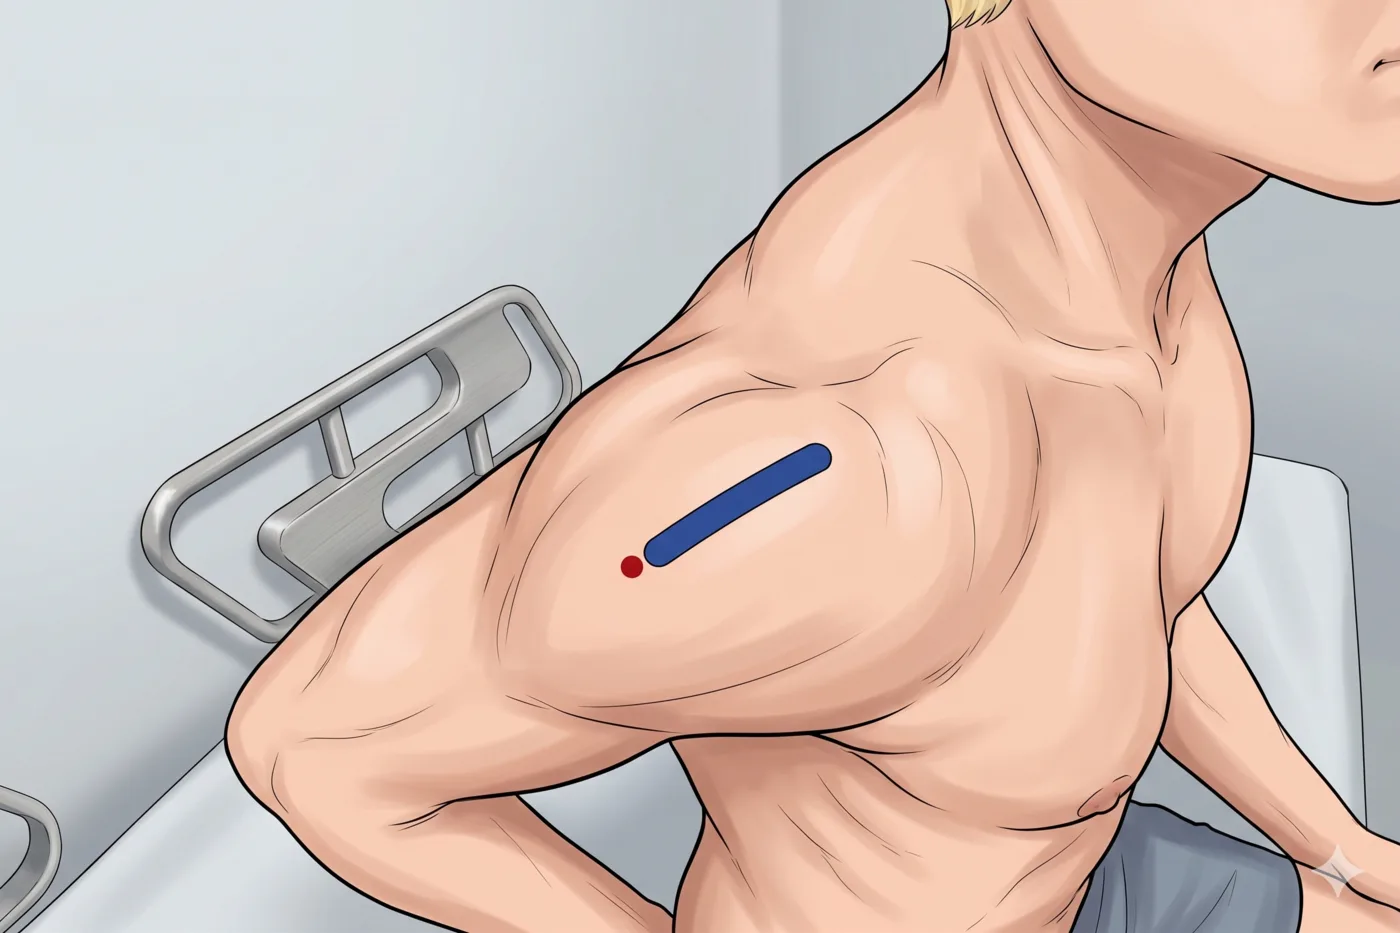
- Place the probe transversely just anterior to the lateral acromial edge.
- Slide anterior-posterior to find the supraspinatus tendon passing under the acromion.
- Center the lateral acromion at the screen edge while keeping the tendon in long-axis.
- Identify the "Bursal Stripe": the thin hypoechoic plane between the deltoid and supraspinatus.
The correct ultrasound view
- Acromion at screen edge; supraspinatus fibers parallel and uniform
- Bursal stripe widens slightly with gentle probe pressure
Needle corridor
- Between deltoid (above) and supraspinatus tendon (below) — inject into the thin bursal stripe
Avoid
- Cephalic vein near the anterior deltoid — relevant only if the entry drifts anterior; the standard lateral in-plane approach stays clear of it
- Intratendinous rotator cuff injection
- Axillary nerve (quadrilateral space ~5-7 cm inferoposterior to the acromial corner — do not direct needle inferiorly or posteriorly beyond the bursal plane)
Steps
- 1Use an in-plane lateral-to-medial approach along the probe long-axis (parallel to supraspinatus fibers), advancing from distal-lateral under the deltoid into the bursal plane under the acromion.
- 2Touch the bursal plane and inject a tiny test amount to confirm plane separation.
- 3Inject the planned volume slowly while watching for smooth medial spread beneath the acromion.
- 4STOP IMMEDIATELY if the patient reports electric, shooting, or paresthetic sensations — withdraw 1-2 mm and reposition before any further injection.
Tips
- If you lose the needle, stop and realign before advancing.
- Adhesions may require gentle needle-tip redirection.
- Monitor injection pressure throughout — if resistance rises sharply before reaching target volume, stop. Overdistension can rupture the bursal wall into surrounding tissue.
- Limit corticosteroid injection to ≤ 3 per joint/site per year.
- If pre-scan or color Doppler shows an artery directly in the planned needle path, abandon and re-plan from a different angle.
Resident pearls
- Think of the bursa as a "potential space" — like a balloon that has been stepped on. It only opens up once you start injecting.
- Dissect the plane with local anesthetic first to confirm you are in the bursa before injecting steroid.
- Check for a "bursogram" post-injection; if injectate is in the tendon, it suggests a rotator cuff tear.
- The bursa extends beyond the supraspinatus footprint — use this to differentiate layers.
- For DIAGNOSTIC SASD blocks, limit to ≤ 5 mL anesthetic to avoid anesthetizing the GH joint or AC joint and confounding the pain-generator localization.
Supplies
- 5 mL or 10 mL Syringe
- 25G 1.5" Needle (or 22G for larger patients)
- 18G Drawing Needle
- 1% Lidocaine (3-5 mL)
- Triamcinolone 40 mg OR Dexamethasone 4-10 mg
- Alcohol Swabs (vial tops)
- Betadine/Chloraprep
- Sterile Gloves
- Sterile 4x4 Gauze Pads
- Sterile Towels & Drapes
- Adhesive Bandage (Band-Aid)
- Washcloth/Towel (gel cleanup)
- Needle Disposal Safety Cap
- Sterile probe cover & gel
Post-procedure
- Apply a clean dressing; remove after 24 hours.
- Local anesthetic provides relief for 1-4 hours; pain may return before steroid takes effect.
- Steroid effect typically begins 24-72 hours after injection.
- Steroid 'flare' (transient worsening for 24-48 hours) occurs in 2–10% — manage with ice and acetaminophen.
- Rest the shoulder for 24-48 hours; resume normal activity as tolerated thereafter.
- Return immediately for: spreading redness, increasing swelling, fever, or pain disproportionate to expected (concern for infection).
- Diabetics: expect a glucose rise of 50-100 mg/dL for 3-5 days.
- Maximum frequency: typically no more than 3 injections per shoulder per year.